How to Use a Phone as a Visualiser for Improved Online Tiddling of Winks
(If you have an android phone and a Windows 10 computer) (It is possible on other OSs but might be harder)
Alex Fairclough, 2020
Ed note: Alex has researched a way to use an Android phone and a Windows PC to provide a persistent mat warping for playing winks over video calls. If the phone can be suitably positioned and you have a PC available, this — or something like it — is likely the most efficient approach; thanks to him for the idea.
If you want to avoid installing software and just take, then individually warp, still images of the mat, this can be done entirely on the web using a utility written in a classic example of Not Invented Here syndrome by the website maintainer (so it definitely won’t leave a virus on your computer, but no promises about how well it works). However, some interaction is required after every shot, which may be normal if you manually wave the camera/phone at the mat after each shot, and tedious if you can lock it in place.
Alternatively, if you can keep your webcam (or phone) in place, you can dynamically warp the content of a camera and overlay coordinates onto it with a live version. This should work directly on a phone, or on a computer whether or not your “webcam” is provided by Iriun (or other software).
The web page approach is not inherently set up for videoconferencing (although screen sharing may work), so the final result won’t be as refined as Alex’s solution; it is more suited to “correspondence winks”. Nonetheless, you may wish to try one of these two solutions first, prior to installing anything, not least because I suspect my way of aligning the mat is a little more intuitive.
Introduction
Pointing a phone at a tiddlywinks mat at a weird angle looks weird because perspective exists, which makes an ordinary game of correspondence winks tricky, and has so far forced us to stick with the Peterhouse Pot.
This guide tells you how to make a weirdly-angled phone-pointed-at-mat look reasonably rectangular, so we can perhaps overlay a grid and have a full game.


Software setup stuff
Using a phone as a webcam: Iriun
If you have a Windows 10 computer and an Android phone, there is a range of fairly simple-to-use software available to make your phone appear as a webcam, as long as both your phone and computer are connected to the same Wi-Fi network. I’ve had the best results with Iriun (the others that I have tried have limited resolution in the free version).
On your phone: Install “Iriun 4k Webcam for PC and Mac” from the Play store.
On your computer: Go to the https://iriun.com/ website and install the webcam software for your OS (for example, click the “Webcam for Windows” button, and keep clicking synonyms for “yes” until is has installed).
(Optional): If you want higher resolution and more stability, or can’t connect phone and computer to the same network, it is possible to get Iriun to send data over USB — you need to enable USB debugging on your phone first (how to do this varies with make/model/OS, and you should only do this if you know what you are doing as it can open vulnerabilities to some forms of malware), then connect your phone to the computer with a USB cable.
Open Iriun on both your phone and your computer, and wait for it to connect, which should happen automatically. You should see this:

(change the resolution if needed — higher is clearer, lower can be more reliable if your Wi-Fi connection is tenuous).
Ed note: At the time of writing, Amazon UK is selling 1080p web cams for under £30. (I somewhere have a box of VGA-resolutions ones that I bought when Homebase decided to sell two-for-£10.) I believe the rest of Alex’s workflow is agnostic to the origin of the second video stream, so it would be remiss not to point out that just acquiring a dedicated device if you’re going to be playing a lot of winks (which of course you are) might not be excessively extortionate, and also not go wrong if someone phones you. But free is better, of course, and phones tend to have surprisingly good cameras in them these days.
Stream-Tweaking software: OBS + plugins
First, install OBS Studio from https://obsproject.com/. OBS Studio is a free video-compositing package, designed for streaming and recording a range of sources. This should be similar to installing any other software, and all the default settings should work fine.
Next, install the StreamFX plugin from https://github.com/Xaymar/obs-StreamFX/releases/tag/0.8.0. StreamFX is a plugin for OBS, which adds a selection of real-time video editing tools/filters, one of which we need to correct the perspective from our awkwardly-placed phone. The downloads are in the “assets” section, very near the bottom of the page — for a Windows machine, you want the one that ends in “.exe”.

Once this has downloaded, find the file, right click, and select “Run as administrator” — as this is a plugin, it installs into the same directories as OBS, so needs administrator permission from the start to be allowed to access the program files directories.

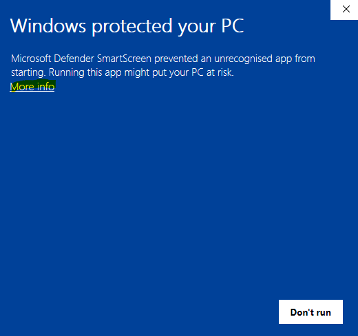
It will probably come up with a message from Windows Defender Smartscreen warning you that it doesn’t recognise the publisher; clicking “More info” will make the “Run Anyway” button appear, so you can carry on and install it.
Once StreamFX is installed, there’s another plugin we need: the OBS virtual camera, from https://obsproject.com/forum/resources/obs-virtualcam.949/. The download button is near the top right corner. This plugin lets the output of OBS appear as a webcam for other programs, so you can use your corrected screen in any video call (such as Skype or Zoom).
Using the stuff you just installed
If you want to use USB instead of Wi-Fi to connect your phone to your computer, turn on USB debugging and connect a USB cable between the two (and make sure your computer notifies you that you’ve connected something — otherwise, try a different USB cable, as some USB cables have wires missing and can only be used for charging, not data connections).
Otherwise, make sure that your phone and computer are connected to the same router (either the same Wi-Fi network, or the same router if using a wired connection).
Open the Iriun app on both your phone and your computer, and wait for it to connect. You should see a window on your computer which tooks like the following:
(I know I’ve already said how to do this, but I though I’d repeat it here in case someone’s already installed everything and skipped to this bit.)
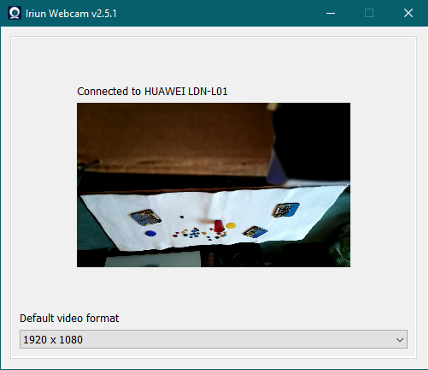
Make sure that the whole mat (or quarter mat probably, because few of us have full mats or the room for a full mat) is visible to your phone camera, and in the window, by moving your phone around, but don’t worry if it is distorted from the angle — this will be fixed later (although the closer to square-on you can get, the better the final image quality will be). Also landscape mats that almost fill the screen work better.
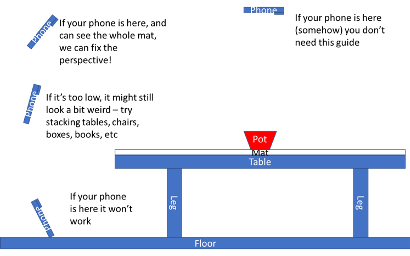
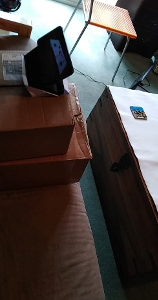
I’ve included a photo of my phone propped on a stacked sofa, cardboard boxes, origami, and an old actual plastic phone stand, as an example (disclaimer: if you try to replicate this and break your phone (or your sofa, or your cardboard, or your origami) then I’m not responsible).
Adding your face to OBS
Click scene collection (at the top)/new, and put in a name (like tiddlywinks) — this saves the layout of cameras you make so you can get it back if you use OBS for anything else or something.

Click the + button in the sources box, and add a new video capture device:
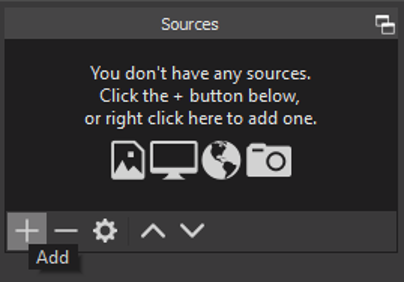
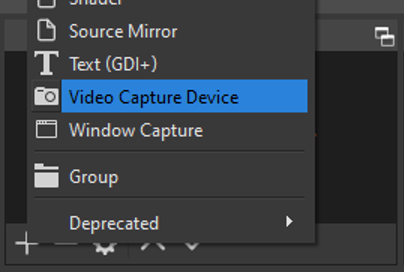
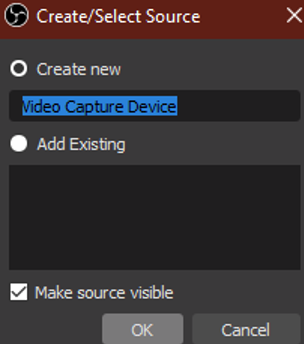
Press ok in the next box (which defaults to “add new”, and has an option to name things, also make sure you leave the "make source visible" box ticked.
Try the different things in the device dropdown until you find one that looks like the picture is coming from your laptop’s webcam, then leave everything else and click okay.
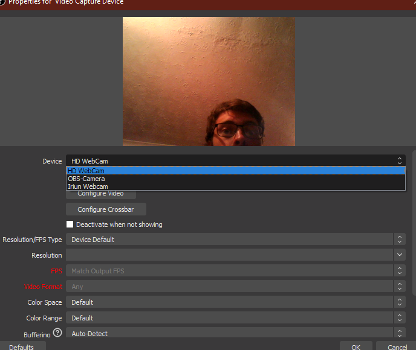
You should see your laptop webcam’s video in a red box, you can move it around and resize it by clicking and dragging.
Adding your phone and fixing perspective
Add another video capture device, but this time pick “Iriun” webcam from the device drop down. Everything else can be default again. You’ll probably end up with something like this:
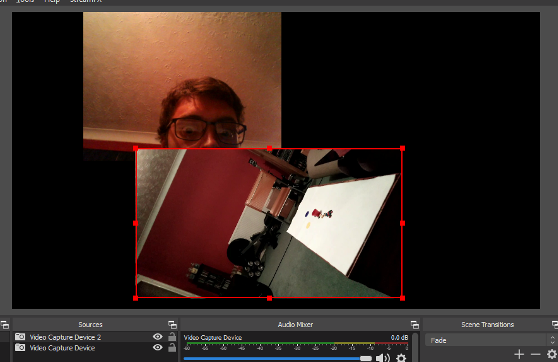
Now we need to fix the perspective stuff: right click on the Iriun one in the “sources” box and click filters. Then click the + button in the bottom left corner, in the “Effect Filters” panel. Then click “3d transform”, which should be at the top.

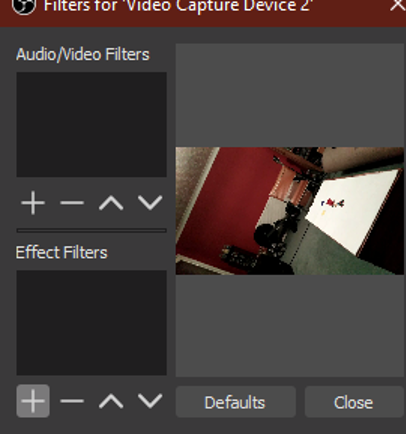
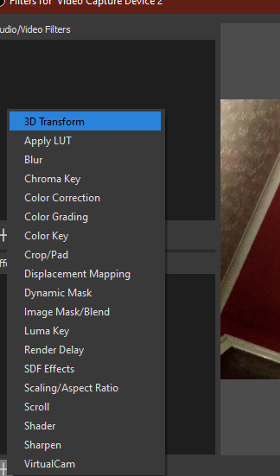
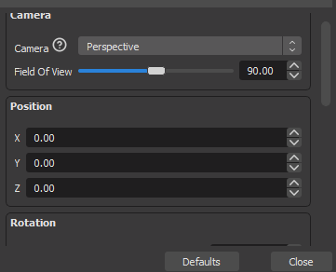
In the top camera box, pick perspective. The scroll down, and play around with the position, pitch/roll/yaw, scale, and shear sliders, until the mat looks right. It can help if you scatter some square things (like coasters) and round things (like CDs, plates and squidgers), to see if the height/width/skewedness is right. It seems like getting the values right is more of an art than a science to me, so just tweak things up and down with the sliders to find which way make it better, then keep going until it looks good. (There aren’t sliders for position, but changing x/y/z by 100 at a time seems about right to get an idea of what they do.)
Ed note: As someone who’s career is in computer graphics and almost entirely about transforming coordinates around to get various effects, I would like it to be known that the previous paragraph has made me have a little cry (but also made me a little smug about the interface I provided the web page versions).
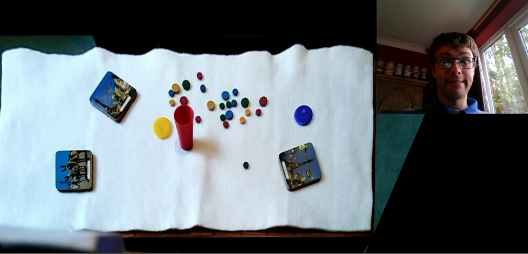
Here’s an example of a properly-adjusted mat: the edges are either horizontal or vertical, and the top/bottom and left/right edges are the same length, square things look square (the edges of square coasters are the same length), round things look round, etc.
Overlaying a grid for correspondence winks
Here is a png with transparency, which fits over a quarter winks mat, and is labelled in inches.
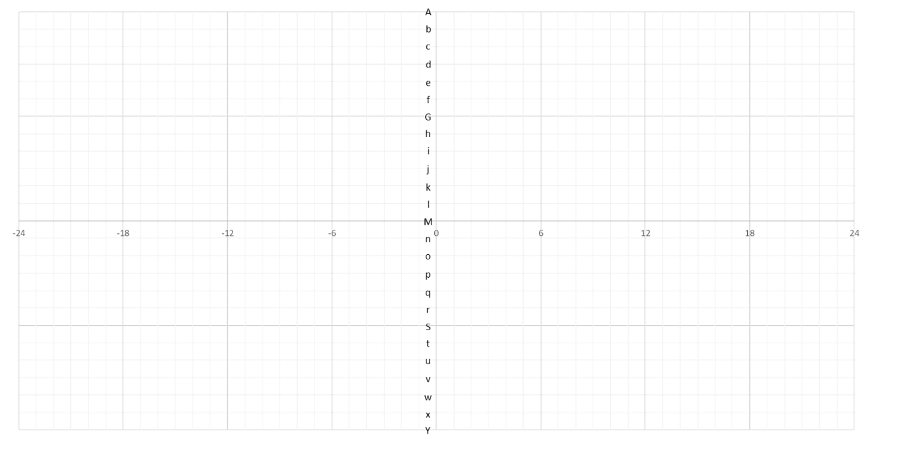
Ed note: While technically correct that it “fits over” the mat, I must point out that Alex can’t count: a quarter winks mat is 36”×18” and a full mat is 72”×36” (with some dispute in the Rules Sub-Committee about whether mats are in fact 180cm×90cm). Therefore on a full mat, this is labelled in units of 1½” and on a quarter-mat it’s labelled in units of ¾”. This matters not a jot so long as everyone knows what’s going on. The following is an svg image (with the same grid units as the PNG) should anybody wish to use it for a similar purpose; it is the version used by the web page-based mat alignment utilities and should scale better, but may not be supported by all applications.